 |
Windows98
Imaging |
Scan
images into your computer
Windows comes shipped with an imaging program that lets
you use a device called a scanner to scan images into
your computer.
The scanner is like a photocopy machine that translates
the images into an electronic format "understood"
by your computer.
Use Imaging to scan images, add something of your own
then save them to your hard drive. The application is
very easy to use click Start>>Programs>>Accessories and launch
Imaging.

If you don't have a scanner you can still
use the application as an image viewer or editor.
Imaging allows you to view a wide range of image formats
unlike Paint that reads only .bmp and .dib images.
Don't expect a hotshot graphic application, Imaging is
mostly used to scan, rotate and flip images, add some
text and lines.
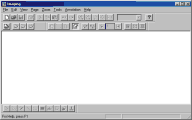
If you installed a scanner, make sure it's on click File>>Scan
New, once scanned you can click on  to flip your image. At the bottom is the
Annotation toolbar, use it to add something of your own to the image
(Annotation only works with .bmp images) to flip your image. At the bottom is the
Annotation toolbar, use it to add something of your own to the image
(Annotation only works with .bmp images)

Draw a filled or empty rectangle, attach a note or use
the Rubber stamp to add a Received on date stamp.
You can also highlight a portion of the image with the
highlighter 
Images can be viewed as thumbnail (small image), normal
size page View or both.
Fit the image into your screen using Best Fit from r-click
Window.
Easily
print any image from File>>Print
Change scan options from Tools>>Scan Options choose Best
quality for small file size in case you are scanning a
piece of paper with no image inside. This will give you
more efficient results. You need to be an experienced
user to choose custom settings
In Thumbnail
size you can specify a size for your
thumbnails, just drag the mouse over the border or choose between the presets under
Aspect
Ratio.
|
|
 |
Choose a Tutorial
What do you need ?
|

